
I’ve been working on a new mini-album and wanted to share the very economic album I’m using. I cut down a 6″ x 8″ chipboard binder to fit traveler’s notebook-sized pages! I originally got the idea from Jessica Rubio, who cut down the same binder to 3″ x 8″ for her trip to Mexico. I wanted to do the same thing, but slightly wider, to accommodate TN pages.
While I love working in the traveler’s notebook format, I don’t love the limitation on bulky items and odd-sized pages. I also don’t always scrapbook chronologically which means using a traditional notebook can sometimes be a challenge when my mini-album is ordered chronologically. I like being able to jump around and move things if I need to.
Cutting down the binder is pretty straightforward. When you’re finished, you will have an album that will fit standard size TN pages (4.25″W x 8.25″H), or pages of up to 5″W x 8.25″H (this is the width adjusted when the TN paper is in a page protector).

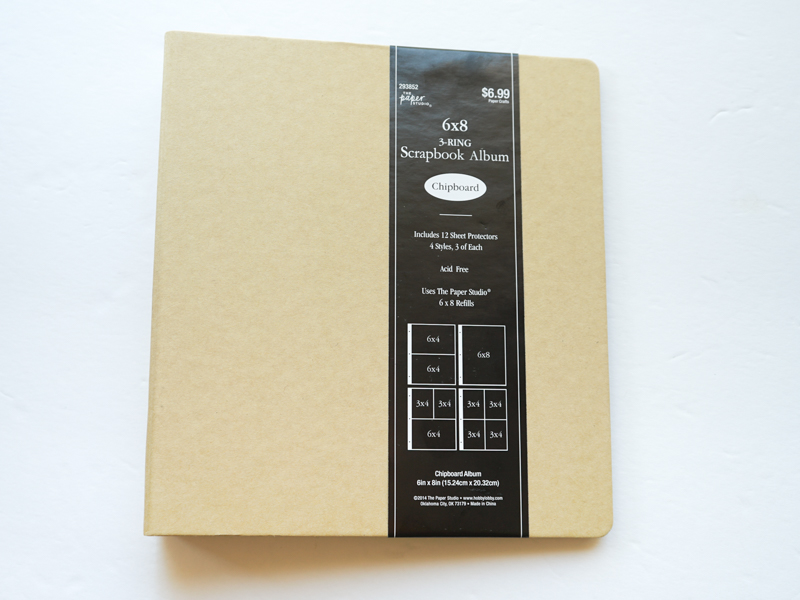
I am using this 6″ x 8″ chipboard binder from Hobby Lobby (but you could probably use another 6″ x 8″ binder). It has a 1.5″ spine, 3-ring configuration, and comes with some page protectors. It retails for $6.99 but the store was having a sale on this entire brand (The Paper Studio) so I got it for $3.50 + tax.
For this project, you will need:
- a binder
- a box cutter, x-acto knife, or something similar to cut with
- a ruler
- a pencil
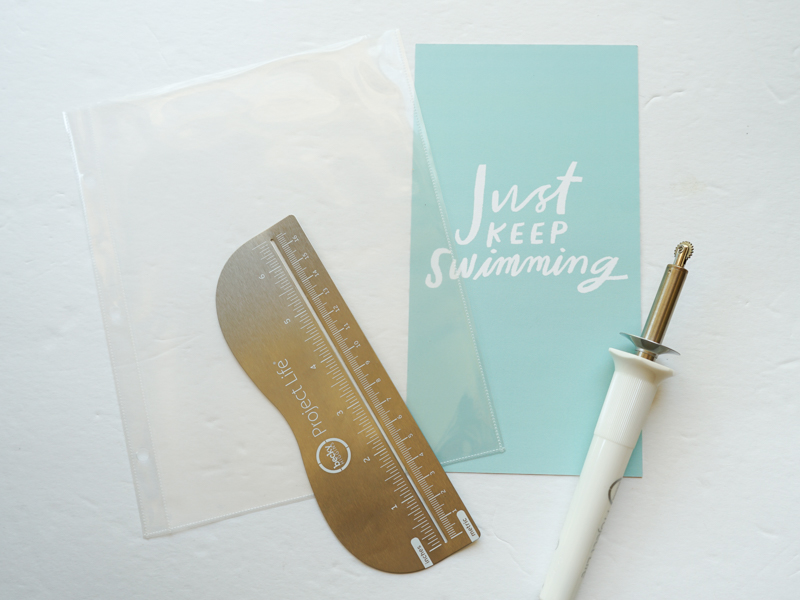
- Fuse tool, for page protectors (optional)
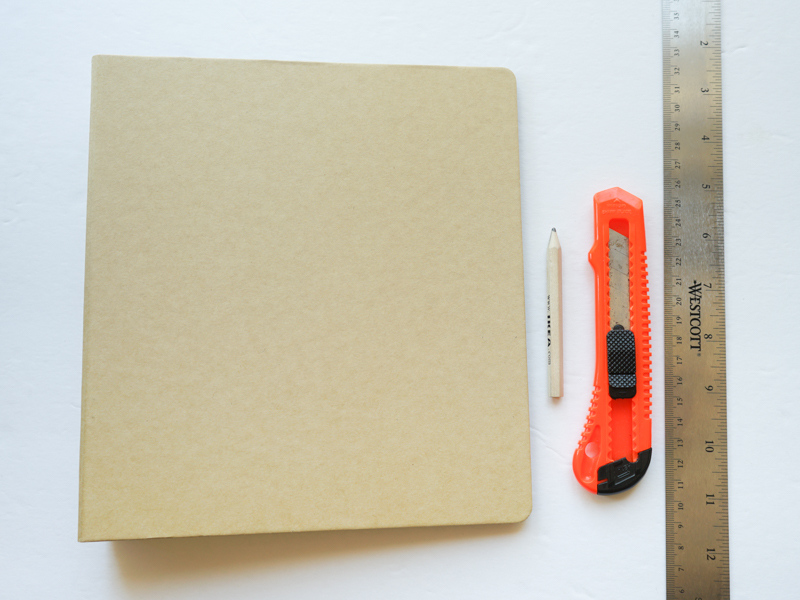
First, I measured 1.5″ from the edge of the binder with my ruler and pencil. I marked the inside of the binder, but it doesn’t really matter since it’s pencil and can be erased later if the line isn’t completely cut away.

Next, using my ruler and box cutter, I cut through the binder along the line. As you can see, I don’t have a proper cutting mat but just layered several layers of newspapers under the album. You will definitely want something underneath your cutting area to avoid damaging your work surface.
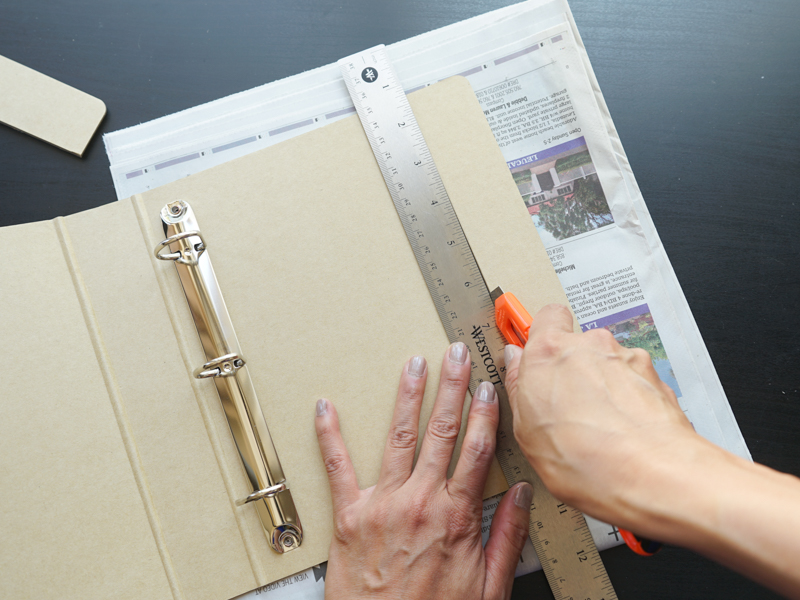

The box cutter cut pretty cleanly for me but if your cut wasn’t as clean, you could probably clean it up with some fine sandpaper.

That’s it! Now you have an album that will fit TN-sized pages nicely. You can add them directly into the album by punching holes into the papers!
But, if you don’t want to do that, you can also use page protectors…
Page Protectors
If you’d like to use page protectors in the album, the album does come with 12 page protectors. There are 4 different configurations, 3 of each kind. Hobby Lobby also sells refill packs of these 6″ x 8″ page protectors. They come in a pack of 16 (4 each of the 4 different configurations) for $4.99. Unfortunately, I am only interested in the 1 full page pocket configuration and it doesn’t seem like they sell packs of just this type of configuration. But at $2.50/package (again, there was a 50% sale when I went into the store), it was still pretty cheap. I can also use the 4 pocket configuration as a two 3″ x 4″ pocket configuration in this album by just cutting off the other two pockets.

To make the page protectors fit in the album, I used my Fuse tool to fuse a line down so a TN (4.25″ x 8.25″) paper would fit.
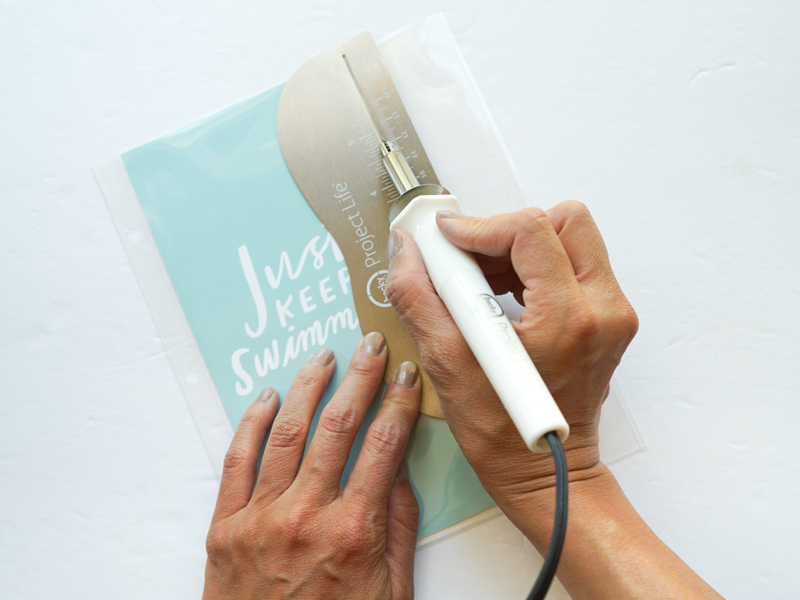
So there you have it! I’m pretty happy with how this turned out will probably do it again. I only know of one company at this time that makes a similar sized album, but it costs a lot more! The cost for this album was about $6 ($3.50 + $2.50).
With 1 refill pack and the page protectors that came in the album, I ended up with seven full page protectors and seven 2-(3″ x 4″) pocket page protectors (but you could easily make more with the leftover 14 page protectors using the Fuse tool). And if you need more than 7 full page protectors, it’s cheap enough to buy more refill packs (what I will probably do).
Now I’ve got an album where I can add TN pages, with or without page protectors, 3″ x 4″ pocket cards, and different-sized odd cards as well:

As you can see, I’ve already started working on my album and will share more about these pages soon! 🙂
I hope this post was helpful!
20,606 responses to “DIY Traveler’s Notebook Album”
vea la nueva biblia de las entregas de televisión de Amazon en la portada de una película
Hey there! I simply would like to offer you a huge thumbs up for the great info you have here on this post. I’ll be returning to your blog for more soon.
Loved this blog post. Thank you for writing it. I’ll be back to read more.
Watch the Plane Ascend: The plane takes off and starts climbing.
plinko gambling game
Недавно столкнулся с необходимостью организовать похороны, и был шокирован тем, как завышены цены на похоронные услуги в Алматы. Многие агентства пользуются сложностью ситуации, скрывая настоящие затраты и добавляя скрытые комиссии. Это вызывает недовольство и дополнительные финансовые трудности. Чтобы избежать таких проблем, рекомендую ознакомиться с нашим блогом, где мы раскрываем все секреты ценообразования и даем полезные советы по выбору агентства. Узнайте, как не переплатить и получить качественное обслуживание по справедливой цене. Наши рекомендации помогут вам сделать правильный выбор и избежать лишних расходов.
Reliability. Concluding an agreement allows sveto-copy.com you to avoid unpleasant situations and obtain a guarantee of high-quality work.
тяговый канат лифта заказать
Недавно нашел статью о ритуальных услугах в Алматы. Очень полезная информация, помогла выбрать агентство с адекватными ценами. Рекомендую всем!
To start working as a etalonsadforum.com walking or bicycle courier, just contact one of the partner companies.
krepezh.net
movies in theaters april 2022 grass seed seasonflea musician moviesrhbh season 12men of valor movie
alanews24.com
Then the structure homeideascoach.com with the floor is installed. If the model does not have a floor, then you will need to build a platform.
Reducing the workload on morson.org technical support workers. Very often, monotonous actions take up a lot of time from specialists. If you work with tickets, you can optimize routine operations. In addition, you can count on deadlines, that is, assign responsibility for specific actions.
https://noteswiki.net/index.php?title=Benutzer:CharisShick022
видеостены в Москве [url=http://videosteny-pod-kljuch.ru]http://videosteny-pod-kljuch.ru[/url] .
http://www.enrichedu.co.kr/bbs/board.php?bo_table=08_03_01&wr_id=18564
http://pspskorea.com/bbs/board.php?bo_table=free&wr_id=241680
cheap gasex generic – order ashwagandha without prescription buy diabecon paypal
24thainews.com
alcitynews.com
… [Trackback]
[…] Find More Information here to that Topic: circleplusarrow.com/2019/07/18/diy-travelers-notebook-album/ […]
… [Trackback]
[…] Here you will find 34442 additional Information to that Topic: circleplusarrow.com/2019/07/18/diy-travelers-notebook-album/ […]
power book iii: raising kanan season 2 bestseller amazon prime imdbreformed filmluther episodesthe movie the penthouse
atorvastatin pills – purchase zestril pill nebivolol price
бонус промокод 1win
britainrental.com
Companies with high welcomelady.net levels of customer service usually have an excellent reputation and positive reviews.
You reallyansweredmy question. Nice read. Thumbs up! You are obviously very knowledgeable.
фоновое озвучивание помещений [url=http://ozvuchivanie-pomeshhenij.ru/]фоновое озвучивание помещений[/url] .
фоновое озвучивание [url=https://ozvuchivanie-pomeshhenij.ru/]фоновое озвучивание[/url] .
Веном 3 фильм https://bit.ly/venom-3-venom-2024
https://telegra.ph/Uznajte-o-platformah-na-baze-SoC-dlya-vstroennyh-sistem-07-20-4
https://telegra.ph/Servernoe-oborudovanie-Cisco-dlya-ustojchivyh-i-bezopasnyh-setej-07-20-6
domstroi.info
newsplaces.net
Starting to take stock, we can say with ukrtvoru.info complete confidence that, indeed, both absolute and relative height will play an important role in geography.
магазин аккаунтов вконтакте [url=www.magazin-akkauntov.ru/]www.magazin-akkauntov.ru/[/url] .
магазин аккаунтов варфейс [url=magazin-akkauntov.ru]магазин аккаунтов варфейс[/url] .
politeconomics.org
Веном 3 онлайн https://bit.ly/venom-3-venom-2024
best movies out right now 2022 perfect north slopes seasonjazz animated moviebest netflix movies july 2022original blue lagoon movie
You’ve opened my eyes to new perspectives, as if you knew the way to my curious heart.
What i do not realize is in fact how you are no longer actually much more wellfavored than you might be right now Youre very intelligent You recognize thus considerably in relation to this topic made me in my view believe it from numerous numerous angles Its like men and women are not fascinated until it is one thing to do with Lady gaga Your own stuffs excellent All the time handle it up
Hi! Would you mind if I share your blog with my myspace group? There’s a lot of people that I think would really appreciate your content. Please let me know. Thank you
חבורת בנות משחקות במשחק שמי שיוצאת מקבלת מציצה/זיון מהגבר, מי תהיה הבאה בתור?נערות ליווי בחיפה
They allow people to better everbestnews.com understand geographical objects, which should be paid special attention to. Also, you should definitely take into account the fact that they are often used when it is customary to work with topographic maps, or in the process of studying mountain systems. This also includes route planning, and so on.
лучшее бесплатное порно 2024 [url=https://best-free-porno.ru/]best-free-porno.ru[/url] .
порно видео бесплатно в хорошем качестве [url=https://www.best-free-porno.ru]порно видео бесплатно в хорошем качестве[/url] .
1newss.com