
I’ve been working on a new mini-album and wanted to share the very economic album I’m using. I cut down a 6″ x 8″ chipboard binder to fit traveler’s notebook-sized pages! I originally got the idea from Jessica Rubio, who cut down the same binder to 3″ x 8″ for her trip to Mexico. I wanted to do the same thing, but slightly wider, to accommodate TN pages.
While I love working in the traveler’s notebook format, I don’t love the limitation on bulky items and odd-sized pages. I also don’t always scrapbook chronologically which means using a traditional notebook can sometimes be a challenge when my mini-album is ordered chronologically. I like being able to jump around and move things if I need to.
Cutting down the binder is pretty straightforward. When you’re finished, you will have an album that will fit standard size TN pages (4.25″W x 8.25″H), or pages of up to 5″W x 8.25″H (this is the width adjusted when the TN paper is in a page protector).

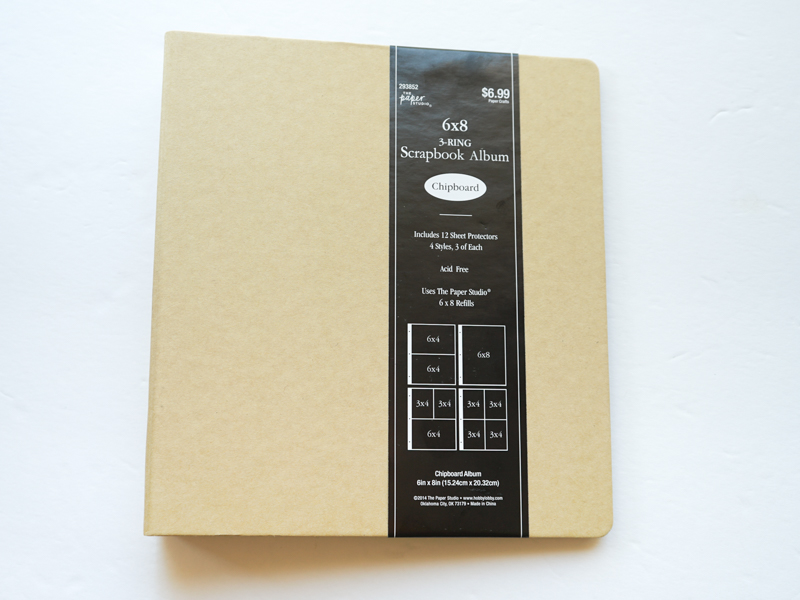
I am using this 6″ x 8″ chipboard binder from Hobby Lobby (but you could probably use another 6″ x 8″ binder). It has a 1.5″ spine, 3-ring configuration, and comes with some page protectors. It retails for $6.99 but the store was having a sale on this entire brand (The Paper Studio) so I got it for $3.50 + tax.
For this project, you will need:
- a binder
- a box cutter, x-acto knife, or something similar to cut with
- a ruler
- a pencil
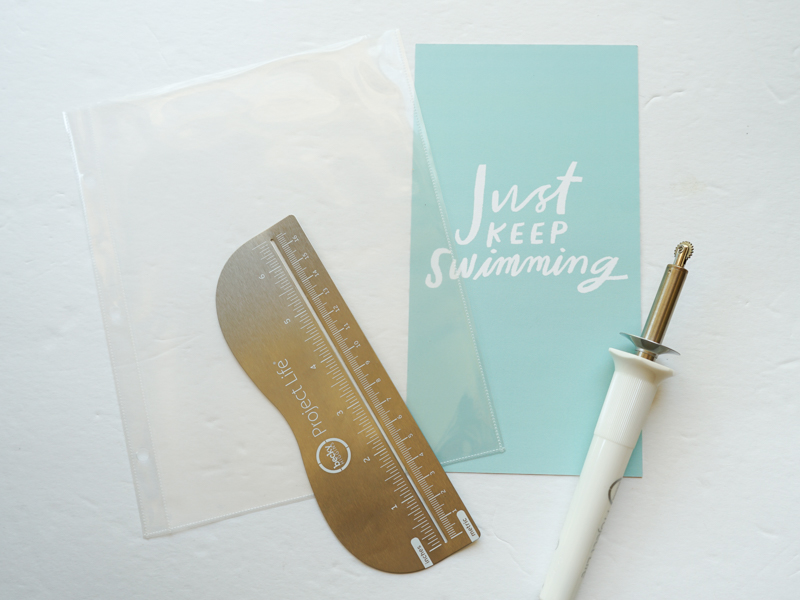
- Fuse tool, for page protectors (optional)
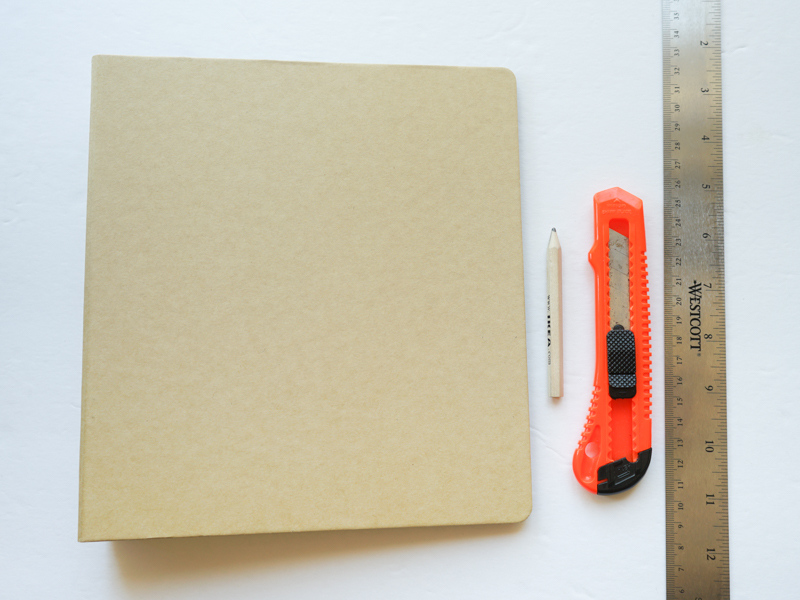
First, I measured 1.5″ from the edge of the binder with my ruler and pencil. I marked the inside of the binder, but it doesn’t really matter since it’s pencil and can be erased later if the line isn’t completely cut away.

Next, using my ruler and box cutter, I cut through the binder along the line. As you can see, I don’t have a proper cutting mat but just layered several layers of newspapers under the album. You will definitely want something underneath your cutting area to avoid damaging your work surface.
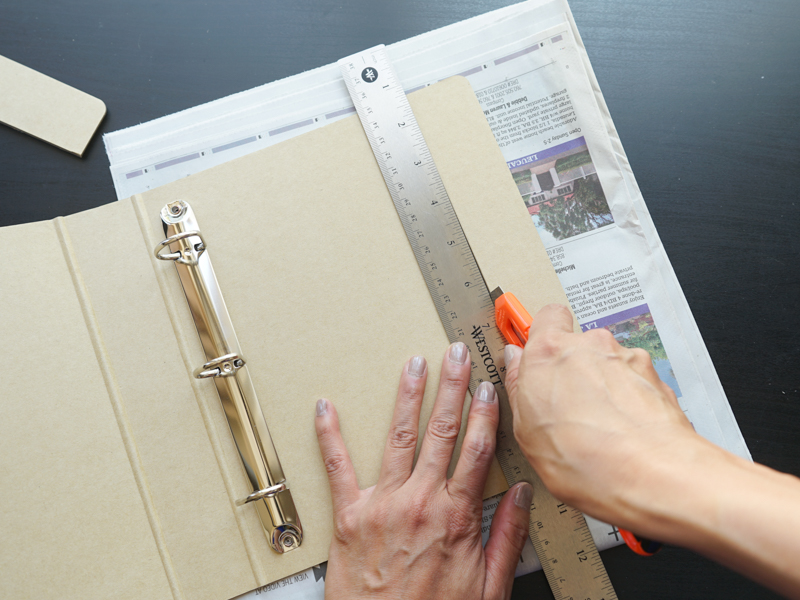

The box cutter cut pretty cleanly for me but if your cut wasn’t as clean, you could probably clean it up with some fine sandpaper.

That’s it! Now you have an album that will fit TN-sized pages nicely. You can add them directly into the album by punching holes into the papers!
But, if you don’t want to do that, you can also use page protectors…
Page Protectors
If you’d like to use page protectors in the album, the album does come with 12 page protectors. There are 4 different configurations, 3 of each kind. Hobby Lobby also sells refill packs of these 6″ x 8″ page protectors. They come in a pack of 16 (4 each of the 4 different configurations) for $4.99. Unfortunately, I am only interested in the 1 full page pocket configuration and it doesn’t seem like they sell packs of just this type of configuration. But at $2.50/package (again, there was a 50% sale when I went into the store), it was still pretty cheap. I can also use the 4 pocket configuration as a two 3″ x 4″ pocket configuration in this album by just cutting off the other two pockets.

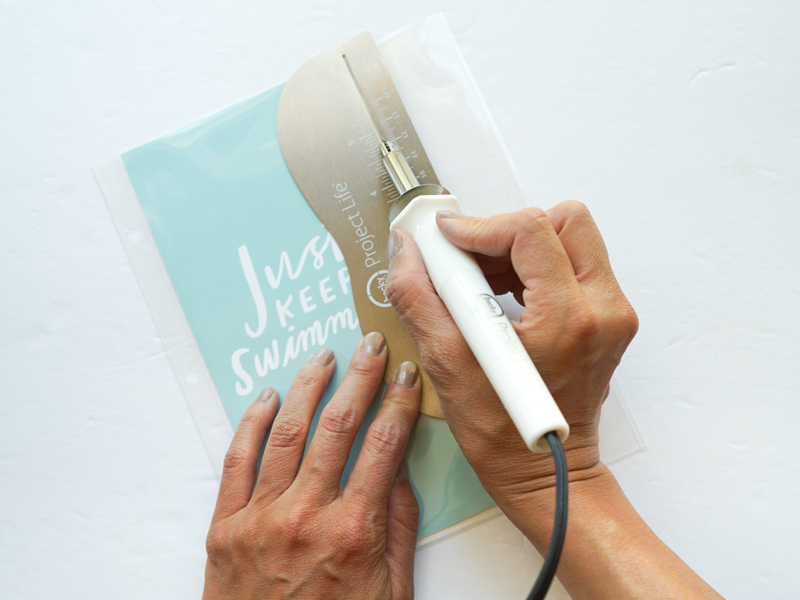
To make the page protectors fit in the album, I used my Fuse tool to fuse a line down so a TN (4.25″ x 8.25″) paper would fit.
So there you have it! I’m pretty happy with how this turned out will probably do it again. I only know of one company at this time that makes a similar sized album, but it costs a lot more! The cost for this album was about $6 ($3.50 + $2.50).
With 1 refill pack and the page protectors that came in the album, I ended up with seven full page protectors and seven 2-(3″ x 4″) pocket page protectors (but you could easily make more with the leftover 14 page protectors using the Fuse tool). And if you need more than 7 full page protectors, it’s cheap enough to buy more refill packs (what I will probably do).
Now I’ve got an album where I can add TN pages, with or without page protectors, 3″ x 4″ pocket cards, and different-sized odd cards as well:

As you can see, I’ve already started working on my album and will share more about these pages soon! 🙂
I hope this post was helpful!
20,606 responses to “DIY Traveler’s Notebook Album”
kraken ссылка vk
Greetings! Very helpful advice within this article! It’s the little changes that produce the largest changes. Thanks for sharing!
kraken darknet ссылка тор kraken2web com
It’s hard to find well-informed people in this particular topic, however, you seem like you know what you’re talking about! Thanks
kraken зеркало online
Excellent post. I was checking continuously this blog andI am impressed! Very helpful info specially the last part🙂 I care for such info much. I was seeking this particular information for a very long time.Thank you and best of luck.
kraken клирнет ссылка
pharmacy technician classes online free clayman pharmacy canada
how to become a missouri real estate agent [url=https://realestatelicensengdfdgh.com/states/north-dakota-real-estate-license/]realestatelicensengdfdgh.com/states/north-dakota-real-estate-license/[/url] to become a real estate agent https://realestatelicensengdfdgh.com .
gocanadanews.com
kraken зеркало рабочее 2kmp
Aw, this was an incredibly nice post. Taking a few minutes and actual effort to generate a very good article… but what can I say… I hesitate a whole lot and don’t manage to get anything done.
construction-rent.com
kraken официальный сайт vtor run
ciprofloxacin coverage uti ciprofloxacin pill identifier ciprofloxacin hydrochloride gas
Basic Rules and Objectives
stromectol
kraken зеркало форум
What’s up, its pleasant post about media print, we all knowmedia is a enormous source of facts.
Hey! Would you mind if I share your blog with my twitter group? There’s a lot of people that I think would really enjoy your content. Please let me know. Cheers
kraken ссылка зеркало 2kmp org
kraken актуальные ссылки 2kmp biz
excellent points altogether, you just gained a new reader. What would you recommend about your submit that you simply made some days in the past? Any sure?
I’m gone to inform my little brother, that he should also visit this blog on regular basis to get updated from most up-to-date reports.
just kraken официальный сайт
классное порево бесплатно [url=http://www.klassny-sex.ru]классное порево бесплатно[/url] .
It is really a great and useful piece of information. I’m glad that you shared this helpful information with us. Please keep us up to date like this. Thanks for sharing.
лучшее бесплатное порно [url=https://best-free-porno.ru]лучшее бесплатное порно[/url] .
классное порево онлайн [url=https://klassny-sex.ru]классное порево онлайн[/url] .
лучшее порно видео бесплатно [url=https://best-free-porno.ru/]лучшее порно видео бесплатно[/url] .
kraken ссылка зеркало krakentor site
Greetings! Very useful advice within this post! It’s the little changes that make thelargest changes. Thanks a lot for sharing!Feel free to surf to my blog post … Goudie CBD– shihan.com.ru –
ссылка на кракен kraken 9 one
How to Play the Aviator Game
stromectol order online
kraken сайт официальный krakenonion site
kraken зеркало kraken link top
kit kraken официальный сайт
kraken зеркало ссылка онлайн 2kraken click
kraken tor ссылка онлайн
kraken зеркало 2krakendarknets2 com
Common Feedback and Suggestions
cheap stromectol 6mg
классное порево [url=www.klassny-sex.ru/]классное порево[/url] .
dynamic features, and social elements, it offers an engaging experience for players. The game is supported by
price of ivermectin tablets
классное порево онлайн [url=http://klassny-sex.ru/]классное порево онлайн[/url] .
the thrill of betting and cashing out. Common themes in reviews include the game’s fairness, the enjoyment of
purchase oral stromectol
Scoring System and Winning Criteria
stromectol 12 mg
kraken зеркало онлайн
Введите [url=https://maxikarta.ru/aktyalnii-promokod-1win-na-polycheniye-bonysa/]1вин промокод[/url] и наслаждайтесь дополнительными возможностями.
game is random and unbiased, providing a fair chance for all players to win.
purchase stromectol online
Активируйте [url=https://maxikarta.ru/aktyalnii-promokod-1win-na-polycheniye-bonysa/]ваучер 1win[/url] для получения эксклюзивных предложений.
кракен ссылка тор kraken one com