
I’ve been working on a new mini-album and wanted to share the very economic album I’m using. I cut down a 6″ x 8″ chipboard binder to fit traveler’s notebook-sized pages! I originally got the idea from Jessica Rubio, who cut down the same binder to 3″ x 8″ for her trip to Mexico. I wanted to do the same thing, but slightly wider, to accommodate TN pages.
While I love working in the traveler’s notebook format, I don’t love the limitation on bulky items and odd-sized pages. I also don’t always scrapbook chronologically which means using a traditional notebook can sometimes be a challenge when my mini-album is ordered chronologically. I like being able to jump around and move things if I need to.
Cutting down the binder is pretty straightforward. When you’re finished, you will have an album that will fit standard size TN pages (4.25″W x 8.25″H), or pages of up to 5″W x 8.25″H (this is the width adjusted when the TN paper is in a page protector).

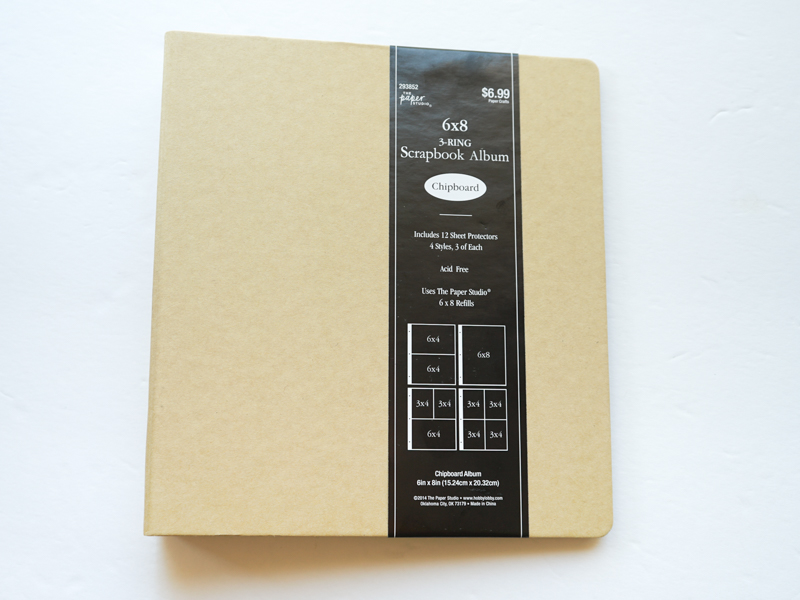
I am using this 6″ x 8″ chipboard binder from Hobby Lobby (but you could probably use another 6″ x 8″ binder). It has a 1.5″ spine, 3-ring configuration, and comes with some page protectors. It retails for $6.99 but the store was having a sale on this entire brand (The Paper Studio) so I got it for $3.50 + tax.
For this project, you will need:
- a binder
- a box cutter, x-acto knife, or something similar to cut with
- a ruler
- a pencil
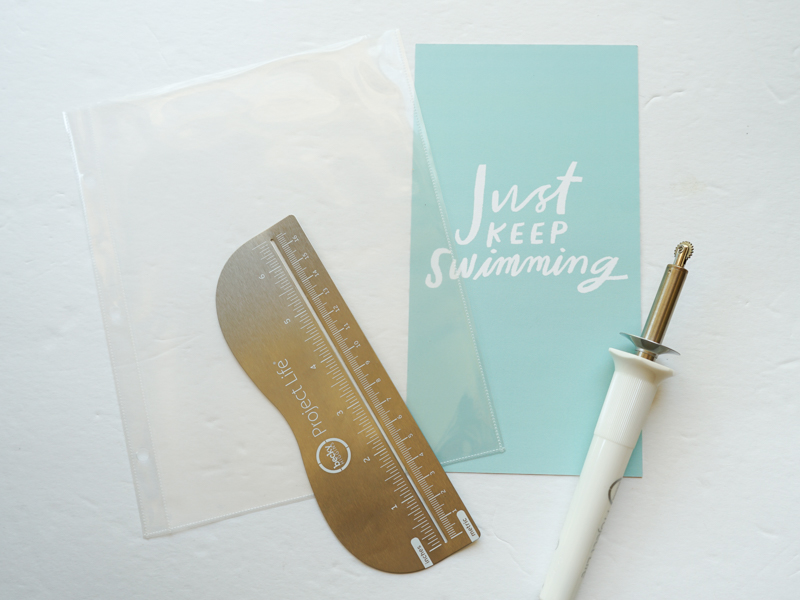
- Fuse tool, for page protectors (optional)
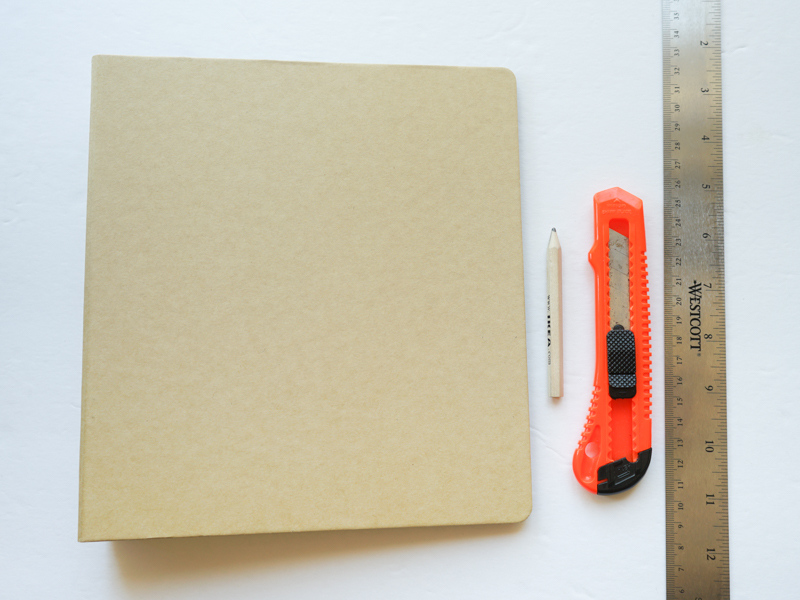
First, I measured 1.5″ from the edge of the binder with my ruler and pencil. I marked the inside of the binder, but it doesn’t really matter since it’s pencil and can be erased later if the line isn’t completely cut away.

Next, using my ruler and box cutter, I cut through the binder along the line. As you can see, I don’t have a proper cutting mat but just layered several layers of newspapers under the album. You will definitely want something underneath your cutting area to avoid damaging your work surface.
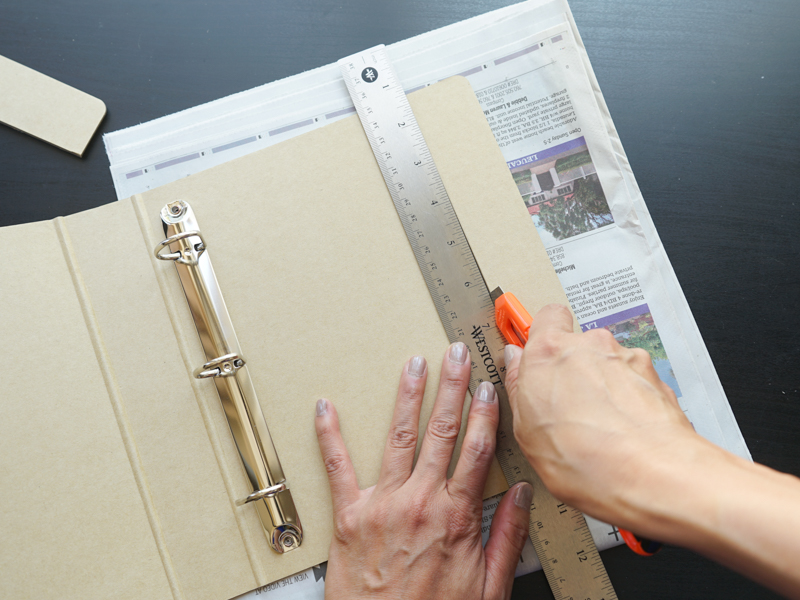

The box cutter cut pretty cleanly for me but if your cut wasn’t as clean, you could probably clean it up with some fine sandpaper.

That’s it! Now you have an album that will fit TN-sized pages nicely. You can add them directly into the album by punching holes into the papers!
But, if you don’t want to do that, you can also use page protectors…
Page Protectors
If you’d like to use page protectors in the album, the album does come with 12 page protectors. There are 4 different configurations, 3 of each kind. Hobby Lobby also sells refill packs of these 6″ x 8″ page protectors. They come in a pack of 16 (4 each of the 4 different configurations) for $4.99. Unfortunately, I am only interested in the 1 full page pocket configuration and it doesn’t seem like they sell packs of just this type of configuration. But at $2.50/package (again, there was a 50% sale when I went into the store), it was still pretty cheap. I can also use the 4 pocket configuration as a two 3″ x 4″ pocket configuration in this album by just cutting off the other two pockets.

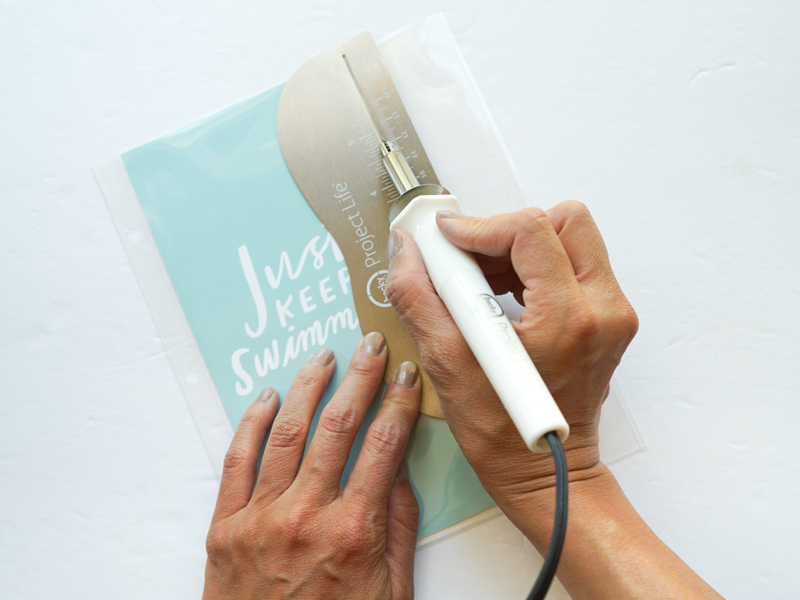
To make the page protectors fit in the album, I used my Fuse tool to fuse a line down so a TN (4.25″ x 8.25″) paper would fit.
So there you have it! I’m pretty happy with how this turned out will probably do it again. I only know of one company at this time that makes a similar sized album, but it costs a lot more! The cost for this album was about $6 ($3.50 + $2.50).
With 1 refill pack and the page protectors that came in the album, I ended up with seven full page protectors and seven 2-(3″ x 4″) pocket page protectors (but you could easily make more with the leftover 14 page protectors using the Fuse tool). And if you need more than 7 full page protectors, it’s cheap enough to buy more refill packs (what I will probably do).
Now I’ve got an album where I can add TN pages, with or without page protectors, 3″ x 4″ pocket cards, and different-sized odd cards as well:

As you can see, I’ve already started working on my album and will share more about these pages soon! 🙂
I hope this post was helpful!
20,607 responses to “DIY Traveler’s Notebook Album”
Wow, you’ve truly surpassed expectations this time! Your hard work and creativity are truly inspiring of this content. I couldn’t resist expressing my gratitude for creating such amazing work with us. Your dedication and talent are truly remarkable. Keep up the amazing work! 🌟👏👍
over dating: http://miamalkova.life/# mia malkova full video
I appreciate you sharing this blog post. Thanks Again. Cool.
mia malkova full video: mia malkova only fans – mia malkova only fans
Amazing, nice one
https://lanarhoades.pro/# lana rhoades solo
ourtime login: http://sweetiefox.pro/# fox sweetie
Say, you got a nice post.Much thanks again. Fantastic.
purchase ondansetron online zofran 8mg over the counter purchase spironolactone online cheap
Aloha! Interesting material! I’m really enjoy this. It will be great if you’ll read my first article on Programming Insider!)
Just desire to say your article is as surprising. The clarity in your post is just excellent and i could assume you are an expert on this subject. Well with your permission allow me to grab your RSS feed to keep updated with forthcoming post. Thanks a million and please keep up the rewarding work.
http://sweetiefox.pro/# fox sweetie
Ucuz takipçi satın al takipçi satın almak isteyenlerin araştırdığı konular arasında yer almaktadır.
lana rhoades: lana rhoades pics – lana rhoades
sweetie fox full: sweetie fox video – ph sweetie fox
http://lanarhoades.pro/# lana rhoades boyfriend
buy imitrex 50mg order generic imitrex 25mg order levaquin 250mg sale
http://sweetiefox.pro/# ph sweetie fox
free adult personals site: https://evaelfie.site/# eva elfie full videos
sweetie fox full: sweetie fox video – sweetie fox full
Hi, of course this piece of writing is genuinely fastidiousand I have learned lot of things from it concerning blogging.thanks.
eva elfie hot: eva elfie – eva elfie
Awesome work
https://lanarhoades.pro/# lana rhoades hot
you are actually a excellent webmaster. The web site loading velocity is incredible. It sort of feels that you’re doing any unique trick. In addition, The contents are masterwork. you’ve done a magnificent process in this subject!
Fabulous, well executed
pof dating sites usa: http://lanarhoades.pro/# lana rhoades hot
child porn
My husband and i were so peaceful that Michael managed to complete his analysis from the precious recommendations he came across while using the web pages. It’s not at all simplistic to just choose to be releasing facts that others may have been trying to sell. Therefore we discover we need the writer to give thanks to because of that. All of the illustrations you’ve made, the straightforward website menu, the friendships you help foster – it’s got all unbelievable, and it’s assisting our son and us believe that that concept is awesome, which is certainly rather essential. Many thanks for the whole lot!
http://sweetiefox.pro/# sweetie fox new
lana rhoades pics: lana rhoades hot – lana rhoades full video
https://sweetiefox.pro/# fox sweetie
eva elfie hot: eva elfie hd – eva elfie videos
adverse effects of ddavp
https://miamalkova.life/# mia malkova movie
eva elfie new videos: eva elfie photo – eva elfie full video
dating site for: https://evaelfie.site/# eva elfie hd
https://aviatorjogar.online/# aviator betano
https://jogodeaposta.fun/# melhor jogo de aposta
aviator oficial pin up [url=https://pinupcassino.pro/#]aviator oficial pin up[/url] pin-up
http://jogodeaposta.fun/# aviator jogo de aposta
buy simvastatin pill order zocor 20mg for sale buy valacyclovir pills
wow, amazing
depósito mínimo 1 real: melhor jogo de aposta para ganhar dinheiro – depósito mínimo 1 real
deposito minimo 1 real: melhor jogo de aposta – aviator jogo de aposta
https://aviatorjogar.online/# aviator jogo
nice content!nice history!! boba 😀
Exceptional, impressive work
http://aviatormocambique.site/# como jogar aviator em mocambique
pin up aviator [url=https://aviatoroyunu.pro/#]aviator oyna[/url] aviator oyna slot
I appreciate you sharing this article.Thanks Again. Great.
http://pinupcassino.pro/# pin-up