
I’ve been working on a new mini-album and wanted to share the very economic album I’m using. I cut down a 6″ x 8″ chipboard binder to fit traveler’s notebook-sized pages! I originally got the idea from Jessica Rubio, who cut down the same binder to 3″ x 8″ for her trip to Mexico. I wanted to do the same thing, but slightly wider, to accommodate TN pages.
While I love working in the traveler’s notebook format, I don’t love the limitation on bulky items and odd-sized pages. I also don’t always scrapbook chronologically which means using a traditional notebook can sometimes be a challenge when my mini-album is ordered chronologically. I like being able to jump around and move things if I need to.
Cutting down the binder is pretty straightforward. When you’re finished, you will have an album that will fit standard size TN pages (4.25″W x 8.25″H), or pages of up to 5″W x 8.25″H (this is the width adjusted when the TN paper is in a page protector).

I am using this 6″ x 8″ chipboard binder from Hobby Lobby (but you could probably use another 6″ x 8″ binder). It has a 1.5″ spine, 3-ring configuration, and comes with some page protectors. It retails for $6.99 but the store was having a sale on this entire brand (The Paper Studio) so I got it for $3.50 + tax.
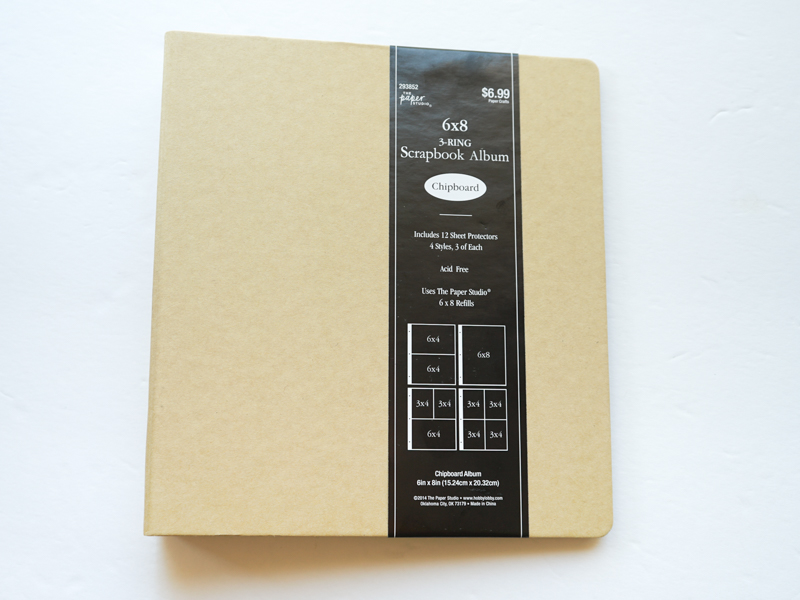
For this project, you will need:
- a binder
- a box cutter, x-acto knife, or something similar to cut with
- a ruler
- a pencil
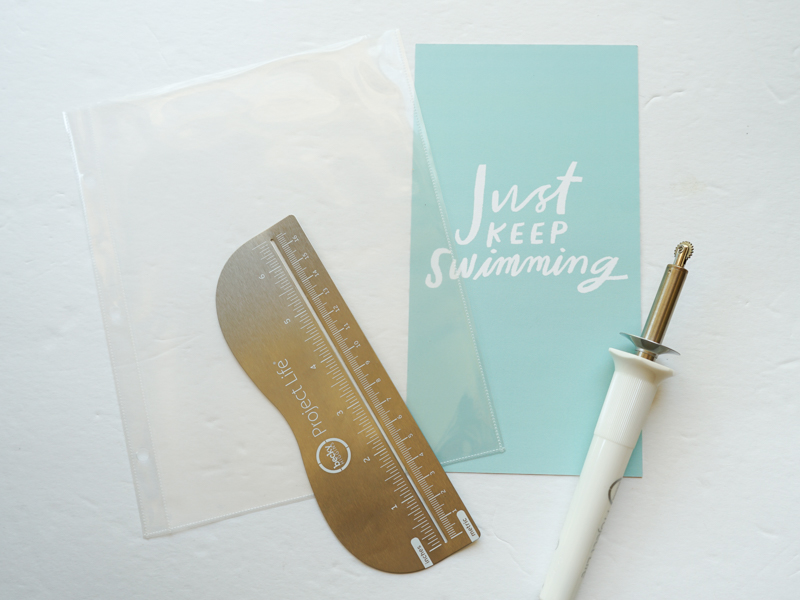
- Fuse tool, for page protectors (optional)
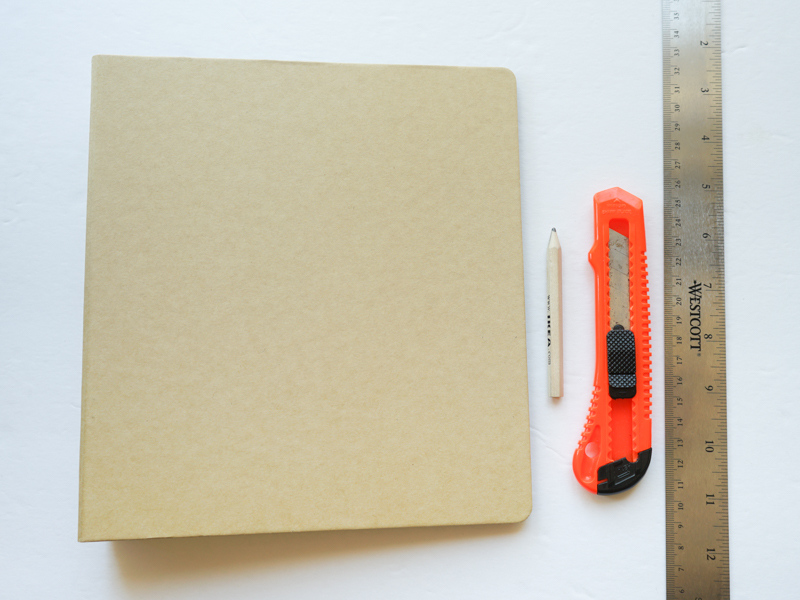
First, I measured 1.5″ from the edge of the binder with my ruler and pencil. I marked the inside of the binder, but it doesn’t really matter since it’s pencil and can be erased later if the line isn’t completely cut away.

Next, using my ruler and box cutter, I cut through the binder along the line. As you can see, I don’t have a proper cutting mat but just layered several layers of newspapers under the album. You will definitely want something underneath your cutting area to avoid damaging your work surface.
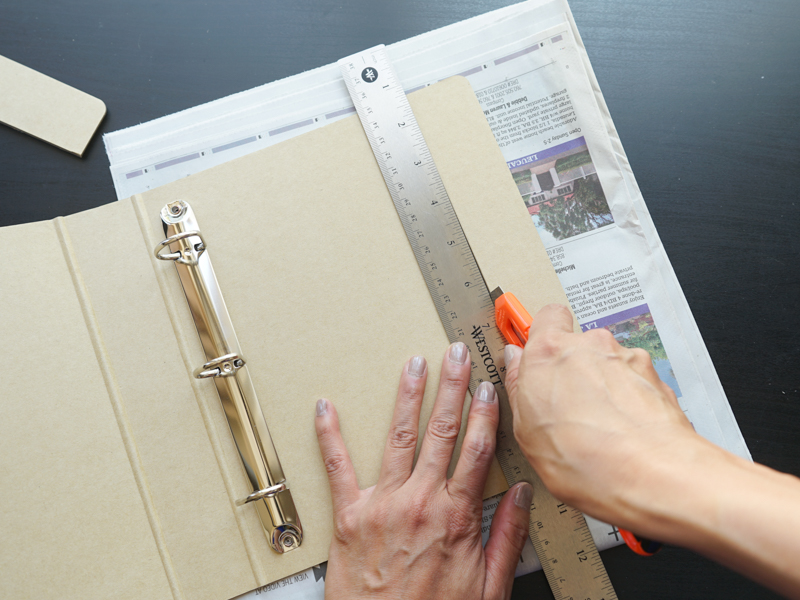

The box cutter cut pretty cleanly for me but if your cut wasn’t as clean, you could probably clean it up with some fine sandpaper.

That’s it! Now you have an album that will fit TN-sized pages nicely. You can add them directly into the album by punching holes into the papers!
But, if you don’t want to do that, you can also use page protectors…
Page Protectors
If you’d like to use page protectors in the album, the album does come with 12 page protectors. There are 4 different configurations, 3 of each kind. Hobby Lobby also sells refill packs of these 6″ x 8″ page protectors. They come in a pack of 16 (4 each of the 4 different configurations) for $4.99. Unfortunately, I am only interested in the 1 full page pocket configuration and it doesn’t seem like they sell packs of just this type of configuration. But at $2.50/package (again, there was a 50% sale when I went into the store), it was still pretty cheap. I can also use the 4 pocket configuration as a two 3″ x 4″ pocket configuration in this album by just cutting off the other two pockets.

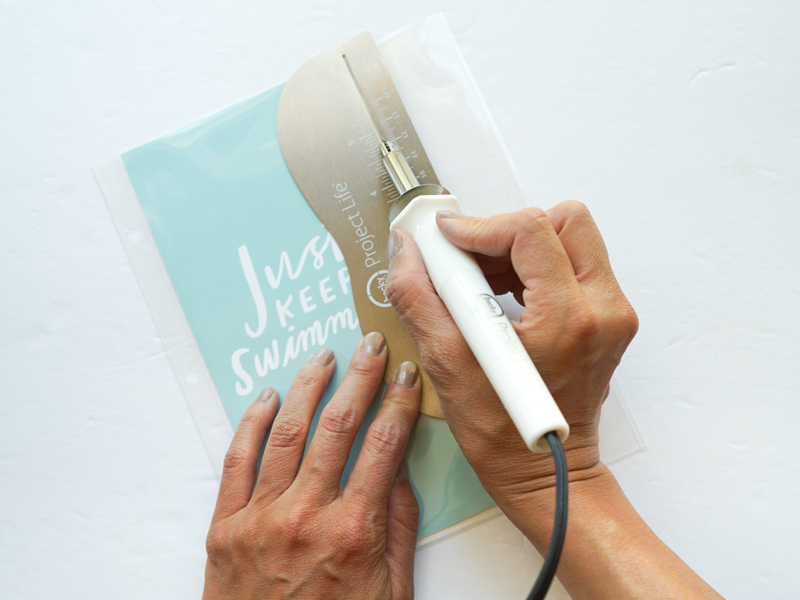
To make the page protectors fit in the album, I used my Fuse tool to fuse a line down so a TN (4.25″ x 8.25″) paper would fit.
So there you have it! I’m pretty happy with how this turned out will probably do it again. I only know of one company at this time that makes a similar sized album, but it costs a lot more! The cost for this album was about $6 ($3.50 + $2.50).
With 1 refill pack and the page protectors that came in the album, I ended up with seven full page protectors and seven 2-(3″ x 4″) pocket page protectors (but you could easily make more with the leftover 14 page protectors using the Fuse tool). And if you need more than 7 full page protectors, it’s cheap enough to buy more refill packs (what I will probably do).
Now I’ve got an album where I can add TN pages, with or without page protectors, 3″ x 4″ pocket cards, and different-sized odd cards as well:

As you can see, I’ve already started working on my album and will share more about these pages soon! 🙂
I hope this post was helpful!
20,606 responses to “DIY Traveler’s Notebook Album”
I am not sure where you’re getting your info, but good topic.I needs to spend some time learning much more or understanding more.Thanks for wonderful info I was looking for this information for mymission.
Looking forward to reading more. Great blog post.Really looking forward to read more. Cool.
Im grateful for the blog post.Really looking forward to read more. Really Great.
Thanks for sharing your thoughts. I really appreciate yourefforts and I will be waiting for your next post thank you once again.
I really liked your article.Really looking forward to read more. Great.
tadalafil order online oral tadalafil indocin online order
Appreciate you sharing, great post.Thanks Again. Want more.
ceftin over the counter buy generic cefuroxime 250mg methocarbamol 500mg ca
desyrel sale order sildenafil 50mg without prescription clindamycin canada
oral terbinafine 250mg real money slots slots free online
online assignment help – expert essay writers how to write a hiring letter
order aspirin 75mg without prescription 300 free slots no download no registration slot machines
I really enjoy the blog post.Much thanks again. Want more.
Enjoyed every bit of your post.
cheap essay writer essays 123 help me order cefixime 100mg sale
I truly appreciate this blog.Really thank you! Really Great.
pay for dissertation best online gambling best casino slots online
Awesome blog post.Much thanks again. Much obliged.
I really liked your blog article.Much thanks again. Want more.
Woah! I’m really loving the template/theme of this blog.
It’s simple, yet effective. A lot of times it’s hard to get that “perfect balance” between usability and appearance.
I must say you’ve done a great job with this. Also, the blog loads super fast for me
on Safari. Outstanding Blog!
Hi, i think that i saw you visited my web site so i came to “return the
favor”.I am attempting to find things to enhance my website!I suppose its ok
to use some of your ideas!!
generic amoxicillin 250mg biaxin 250mg sale clarithromycin 250mg pill
A fascinating conversation deserves remark. I assume that you ought to create extra on this topic, it might not be a frowned on subject but usually individuals are not enough to talk on such subjects. To the next. Cheers
It’s truly a great and useful piece of info. I am glad that you simply shared this helpful info with us.Please stay us informed like this. Thanks for sharing.
This article will help the internet people for creatingnew blog or even a blog from start to end.
very useful for you. advantages you would like to have.
purchase calcitriol generic cost labetalol 100 mg tricor 200mg generic
A fascinating discussion is worth comment. I do believe that you should write more on this issue, it may not be a taboo matter but generally people do not speak about such subjects. To the next! All the best!!
sildenafil and pulmonary hypertension natural sildenafil
apartments for rent rialto income restricted apartments near me union city apartments
This is my first time pay a quick visit at here and i am genuinely impressed to read everthing at single place.
Really appreciate you sharing this post.Much thanks again.
Amazing tons of useful knowledge! canadian online pharmacy
Generally I do not read article on blogs, but I wish to say that this write-up very forced me to try and do so! Your writing style has been amazed me. Thanks, quite nice article.
What’s up it’s me, I am also visiting this site daily, this web site is really good and the viewers are actually sharing nice thoughts.
order catapres 0.1 mg generic buy clonidine order tiotropium bromide 9mcg without prescription
I think this is a real great post.Really thank you! Great.
sukses terus bang, aku hari ini dapet jekpot lagi nih udah wd 10jtamodal depo 500ribu. trik cara bermain dan LINK APP nyaudah di share di YouTube aku
I have been surfing online greater than 3 hours these days,
yet I never discovered any fascinating article like yours.
It’s lovely worth sufficient for me. In my opinion, if all site owners and bloggers made excellent
content material as you did, the web will probably be much more useful
than ever before.
This is a really good tip especially to those fresh to the blogosphere. Simple but very precise info… Thanks for sharing this one. A must read post!
wow, awesome blog article.Much thanks again.
pills to treat acne purchase trileptal online oxcarbazepine sale
Aw, this was an incredibly good post. Spendingsome time and actual effort to generate a good article… but whatcan I say… I put things off a lot and don’t manage to get nearly anythingdone.
WOW just what I was searching for. Came here by searching for unnatural
If you would like to take much from this postthen you have to apply these strategies to your won blog.
WOW just what I was searching for. Came here by searching for try this out
cheap minocycline 100mg buy hytrin online cheap buy requip 1mg for sale
buy alfuzosin medication non drowsy allergy medication canada which anti anxiety drugs increase heartburn
buy sleeping tablets uk online online prescription weight loss clinics virtual doctor for weight loss
The Brand New Technology For Those Who Want To Be Incredibly Rich https://guruprofitbot.pages.dev