
I’ve been working on a new mini-album and wanted to share the very economic album I’m using. I cut down a 6″ x 8″ chipboard binder to fit traveler’s notebook-sized pages! I originally got the idea from Jessica Rubio, who cut down the same binder to 3″ x 8″ for her trip to Mexico. I wanted to do the same thing, but slightly wider, to accommodate TN pages.
While I love working in the traveler’s notebook format, I don’t love the limitation on bulky items and odd-sized pages. I also don’t always scrapbook chronologically which means using a traditional notebook can sometimes be a challenge when my mini-album is ordered chronologically. I like being able to jump around and move things if I need to.
Cutting down the binder is pretty straightforward. When you’re finished, you will have an album that will fit standard size TN pages (4.25″W x 8.25″H), or pages of up to 5″W x 8.25″H (this is the width adjusted when the TN paper is in a page protector).

I am using this 6″ x 8″ chipboard binder from Hobby Lobby (but you could probably use another 6″ x 8″ binder). It has a 1.5″ spine, 3-ring configuration, and comes with some page protectors. It retails for $6.99 but the store was having a sale on this entire brand (The Paper Studio) so I got it for $3.50 + tax.
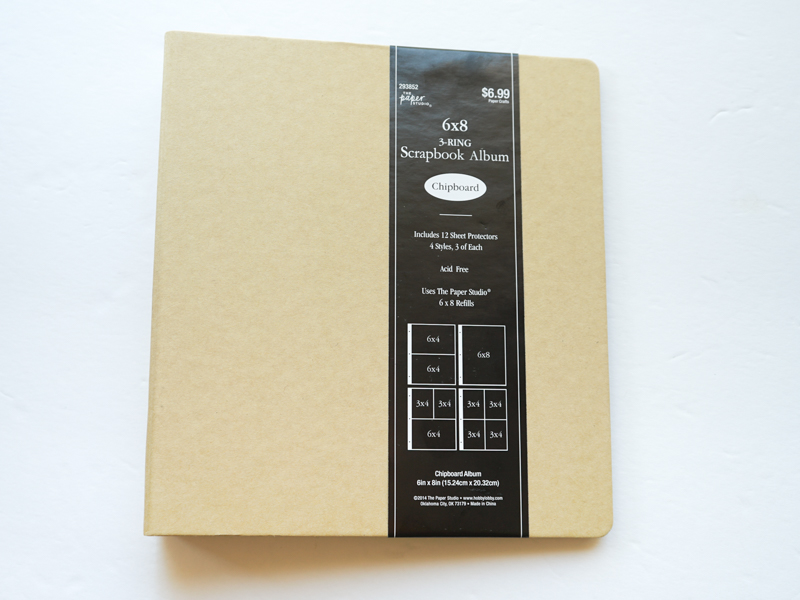
For this project, you will need:
- a binder
- a box cutter, x-acto knife, or something similar to cut with
- a ruler
- a pencil
- Fuse tool, for page protectors (optional)
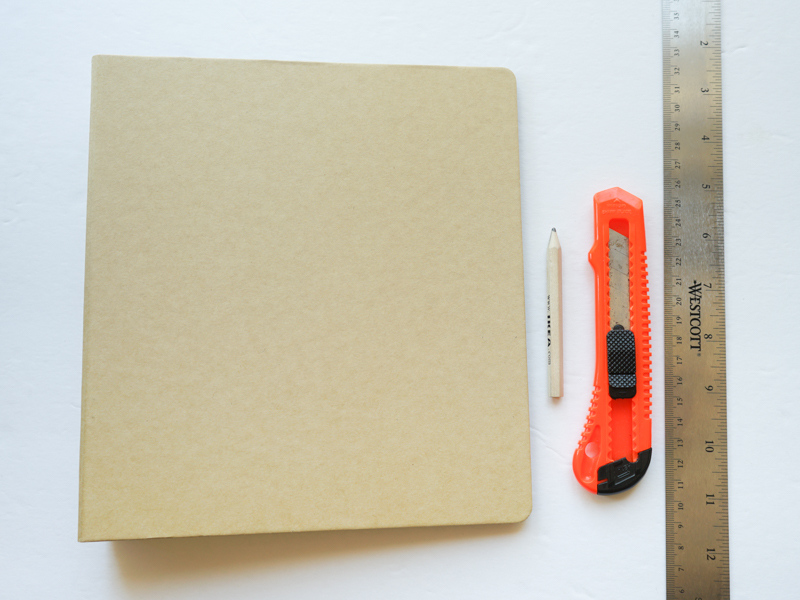
First, I measured 1.5″ from the edge of the binder with my ruler and pencil. I marked the inside of the binder, but it doesn’t really matter since it’s pencil and can be erased later if the line isn’t completely cut away.

Next, using my ruler and box cutter, I cut through the binder along the line. As you can see, I don’t have a proper cutting mat but just layered several layers of newspapers under the album. You will definitely want something underneath your cutting area to avoid damaging your work surface.
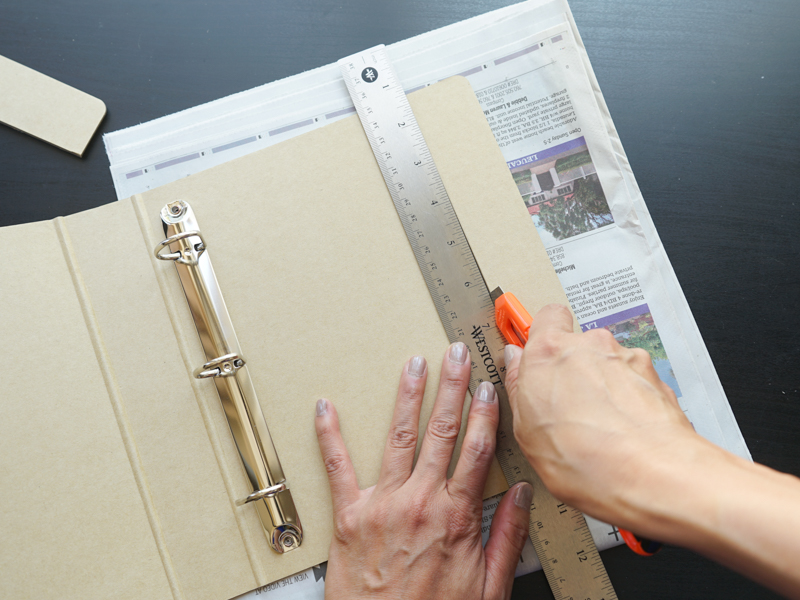

The box cutter cut pretty cleanly for me but if your cut wasn’t as clean, you could probably clean it up with some fine sandpaper.

That’s it! Now you have an album that will fit TN-sized pages nicely. You can add them directly into the album by punching holes into the papers!
But, if you don’t want to do that, you can also use page protectors…
Page Protectors
If you’d like to use page protectors in the album, the album does come with 12 page protectors. There are 4 different configurations, 3 of each kind. Hobby Lobby also sells refill packs of these 6″ x 8″ page protectors. They come in a pack of 16 (4 each of the 4 different configurations) for $4.99. Unfortunately, I am only interested in the 1 full page pocket configuration and it doesn’t seem like they sell packs of just this type of configuration. But at $2.50/package (again, there was a 50% sale when I went into the store), it was still pretty cheap. I can also use the 4 pocket configuration as a two 3″ x 4″ pocket configuration in this album by just cutting off the other two pockets.

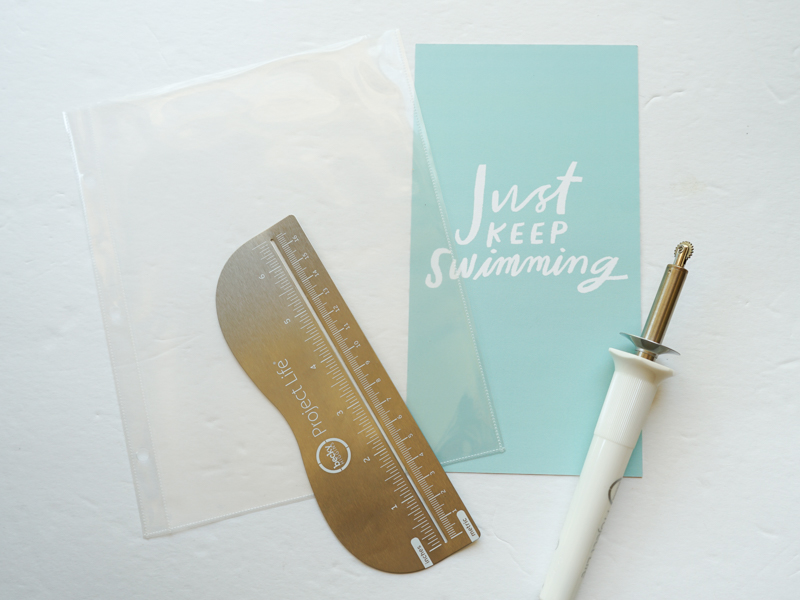
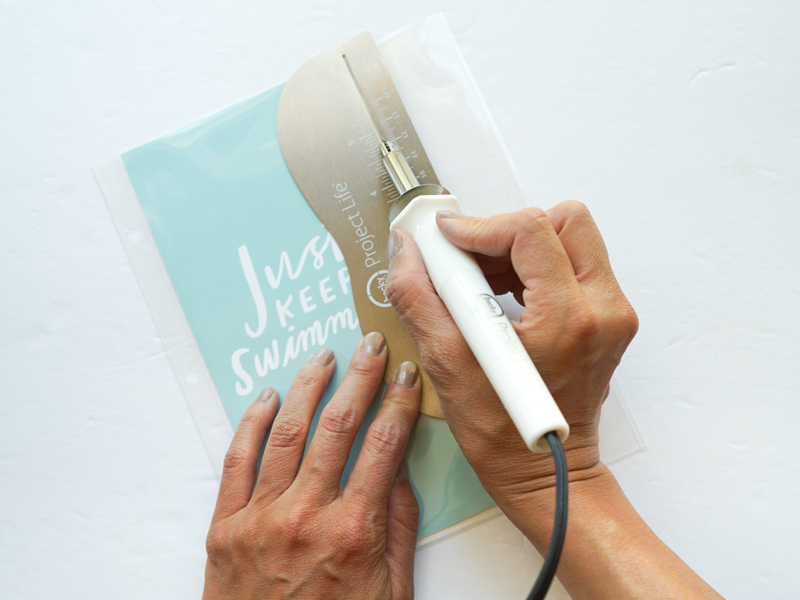
To make the page protectors fit in the album, I used my Fuse tool to fuse a line down so a TN (4.25″ x 8.25″) paper would fit.
So there you have it! I’m pretty happy with how this turned out will probably do it again. I only know of one company at this time that makes a similar sized album, but it costs a lot more! The cost for this album was about $6 ($3.50 + $2.50).
With 1 refill pack and the page protectors that came in the album, I ended up with seven full page protectors and seven 2-(3″ x 4″) pocket page protectors (but you could easily make more with the leftover 14 page protectors using the Fuse tool). And if you need more than 7 full page protectors, it’s cheap enough to buy more refill packs (what I will probably do).
Now I’ve got an album where I can add TN pages, with or without page protectors, 3″ x 4″ pocket cards, and different-sized odd cards as well:

As you can see, I’ve already started working on my album and will share more about these pages soon! 🙂
I hope this post was helpful!
20,608 responses to “DIY Traveler’s Notebook Album”
The Montreal Expos have been also on parlay cards when that groupexisted.
You could certainly see your expertise in the work you write. The sector hopes for even more passionate writers like you who are not afraid to mention how they believe. Always follow your heart.
Pharmacie en ligne livraison Europe: pharmacies en ligne certifiГ©es – trouver un mГ©dicament en pharmacie
stromectol generic name purchase oral ivermectin
what is escitalopram used for prozac vs lexapro
швеллер
Acheter Sildenafil 100mg sans ordonnance: Viagra sans ordonnance 24h – Viagra sans ordonnance pharmacie France
аппаратура для реанимации
товары для хирургии
I want to to thank you for this fantastic read!! I definitelyenjoyed every little bit of it. I have you book marked to check out new stuff you post…
Viagra pas cher inde: Viagra sans ordonnance 24h – Viagra pas cher livraison rapide france
flagyl dose forms metronidazole for meningitis interactions for metronidazole
Hello! This post could not be written any better! Reading this post reminds me of my oldroom mate! He always kept chatting about this.I will forward this post to him. Pretty sure he will have a good read.Thanks for sharing!
https://barsu.by/
http://www.allshveller.ru/
Thank you for another wonderful article. Where else may anyone get that kind of information in such an ideal way of writing? I’ve a presentation subsequent week, and I am at the look for such information.
My relatives all the time say that I am killing my time here at net, except I know I am getting knowledge daily by reading such pleasant articles or reviews.
оборудование для операционной
http://reanimob.ru/
pharmacie en ligne france pas cher: pharmacie en ligne france livraison internationale – Pharmacie en ligne livraison Europe
vente de mГ©dicament en ligne: Cialis sans ordonnance 24h – pharmacie en ligne france livraison belgique
pharmacie en ligne: cialis generique – Pharmacie sans ordonnance
п»їpharmacie en ligne france: Levitra 20mg prix en pharmacie – pharmacies en ligne certifiГ©es
п»їpharmacie en ligne france: pharmacie en ligne livraison europe – pharmacie en ligne pas cher
pharmacie en ligne: kamagra en ligne – Pharmacie en ligne livraison Europe
Pharmacie en ligne livraison Europe: levitra en ligne – pharmacie en ligne
pharmacies en ligne certifiГ©es: levitra generique prix en pharmacie – pharmacie en ligne france pas cher
ремонт под ключ цена за метр
pharmacie en ligne fiable: cialis generique – Pharmacie sans ordonnance
Acheter Sildenafil 100mg sans ordonnance: viagra en ligne – Viagra pas cher inde
acheter mГ©dicament en ligne sans ordonnance: kamagra en ligne – п»їpharmacie en ligne france
ascorbic acid dreadful – ascorbic acid iron ascorbic acid quality
pharmacie en ligne fiable: Levitra acheter – Pharmacie en ligne livraison Europe
pharmacie en ligne pas cher: pharmacie en ligne sans ordonnance – pharmacie en ligne livraison europe
pharmacie en ligne: kamagra 100mg prix – pharmacie en ligne france livraison belgique
Viagra pas cher paris: Viagra generique en pharmacie – Viagra 100mg prix
Viagra sans ordonnance 24h: viagra sans ordonnance – Prix du Viagra 100mg en France
Viagra homme sans ordonnance belgique: Acheter du Viagra sans ordonnance – SildГ©nafil 100 mg sans ordonnance
dapoxetine and tadalafil
I have been surfing online more than three hours today, yet I never found any
interesting article like yours. It is pretty worth
enough for me. In my opinion, if all webmasters and bloggers made
good content as you did, the net will be a lot more useful
than ever before.
my homepage :: nordvpn special coupon code 2024
Pharmacie sans ordonnance: achat kamagra – pharmacie en ligne france livraison belgique
Незаменимая часть гардероба – тактичные штаны, дадут комфорт и уверенность.
Незаменимые для занятий спортом, тактичные штаны станут вашим надежным помощником.
Качественные материалы и прочные швы, сделают тактичные штаны вашим любимым предметом гардероба.
Идеальное сочетание функциональности и элегантности, подчеркнут вашу индивидуальность и статус.
Почувствуйте удобство и стиль в тактичных штанах, порадуют вас надежностью и удобством.
штани тактичні чоловічі [url=https://taktichmishtanu.kiev.ua/]штани тактичні чоловічі[/url] .
pharmacie en ligne france livraison belgique: cialis prix – pharmacie en ligne pas cher
I highly advise to avoid this site. My personal experience with it has been purely disappointment along with concerns regarding scamming practices. Proceed with extreme caution, or better yet, seek out a more reputable platform to meet your needs.
п»їpharmacie en ligne france: Pharmacie en ligne livraison Europe – pharmacie en ligne france livraison internationale
Pharmacie sans ordonnance: Medicaments en ligne livres en 24h – pharmacie en ligne france pas cher
I urge you steer clear of this platform. My personal experience with it was only dismay and doubts about scamming practices. Exercise extreme caution, or alternatively, look for an honest service to fulfill your requirements.
trouver un mГ©dicament en pharmacie: Cialis sans ordonnance 24h – Pharmacie en ligne livraison Europe
trouver un mГ©dicament en pharmacie: levitra en ligne – pharmacie en ligne avec ordonnance
pharmacie en ligne france fiable: kamagra gel – pharmacies en ligne certifiГ©es